And So Ends NCSS 2010
The past weekend has been a large on in programming for me, having both the finals for Progcomp (Run by the university of NSW) and the last week of the NCSS programming challenge.
In Progcomp my team managed to soar up the ladder from last in the finals to second last (that's still 6th place out of 13o teams or so overall) and was utterly flattened by James Ruse who finished all the challenges in an amazing 1:40. We Still had an awesome time going up to Sydney and having a look around the university on its open day and we look forwards to hopefully being back next year.
Last week was also the final week of the NCSS challenge where you are given 5 problems to solve for 5 weeks. The beginners division of this competition is a great way it get into learning programming/python if you are interested. This year i entered the advanced division and managed to place 11th on 188 points solving all the questions except for the last and rather evil Peg Solitaire question (worth 20 points instead of the usual 10) . I am reasonably happy with this and hopefully i am able to move up the board a bit more next year and so ends NCSS 2010.
Recycled Zero Cost 3D Scanner
This is another one of the projects I have done for Design and Technology at school. This time it is for a Year 11 minor project where we had to design the majority of the project out of reused materials that would otherwise be thrown away. I was originally going to do some more experimentation with casting aluminium but then I decided on building this 3d scanner.
The project consisted of:
- Building a turntable to be controlled by the computer that can rotate the object accurately
- Convert a laser pointer to emit a line onto the object rather than a dot
- Have some way to take pictures of the position of the laser line on the object
- Write programs to control the turntable, find and process the laser line in the captured images and display the processed information as a 3d model
Here is a picture of the general setup I ended up using (I didn't get a good photo of the new stepper and gearing I got to rotate the object)
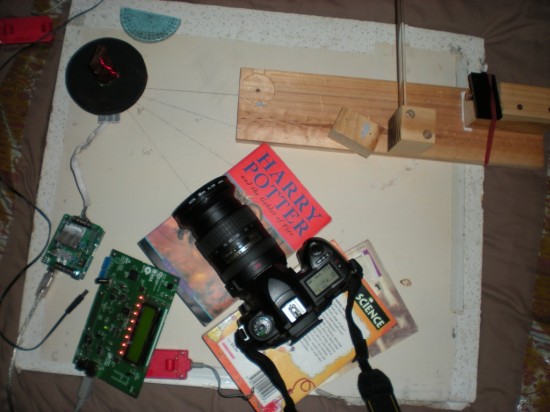
In this image you can see the turntable (black circle), the laser pointer being refracted into a line using the glass rod in the top right, the circuit board used to control the motor, and the board used as a quick way to trigger the camera.
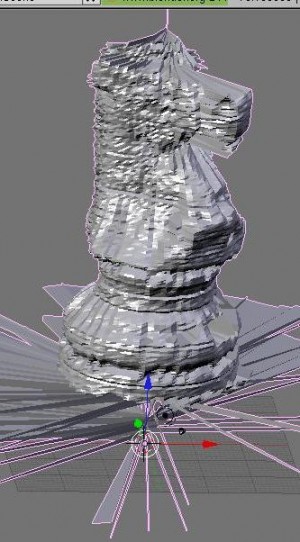
Here are some images from the different stages of the process:
The object sits on the turntable and is rotated accurately using a stepper motor. The first stepper I used allowed 98 steps per revolution (the scan you can see below) while the second stepper motor I used had extra gearing and allowed 290 steps per revolution.
The hardest stage in the entire project is the extraction of an exact line from the image. The stages of this are:
- Load the raw image
- Extract the Red channel out of the RGB image
- Find the entire line in this image as a 2 bit image
- Decide upon an exact line through the previous blob ignoring noise
Coordinates are calculated for each point using how high in the image each point on the line is, what rotation the table was at in the image and some basic trigonometry to create thousands of data points that are then linked and covered with faces by a blender script to create a model.
Then I have simply manually tidied up the model removing where the table appears in the scan and smoothing it.
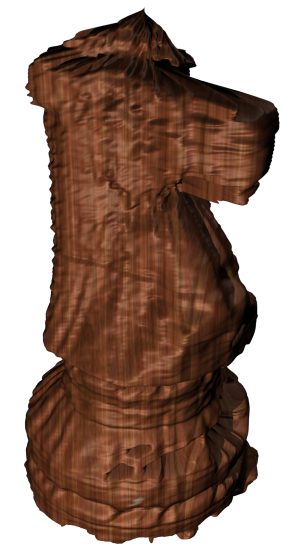
Then I have applied a stock wood texture to the model to produce the final result. I think that it has turned out rather well for a first go at creating a 3D scanner especially as it only took a few weeks and cost me nothing.
I am happy to answer any questions you might have and last of all if you are still curious here are some of the sheets I handed in with my folio to show how the points were converted after extraction.
[download id="11"]
Stacker – Arduino
For the final week of the NCSS embedded programming challenge, we had the option of creating any program we wanted (to run on the ED1 board) to be entered into a competition. For my entry i decided to make an arduino version of stacker, see the video below.
I will add the source code after the competion
The game is quite simple to play (press either button to start/stop blocks and the board's reset button to restart), but gets ridiculously hard realy quickly, i am yet to get to the leds to the end.
I also failed to compleate any of the final weeks problems, besides this one becasue of being exhasted from shifting logs.
Arduino and MSN
Since somebody asked i have written up how to get MSN and Arduino to communicate.
Firstly, i use Windows Live Messenger Plus (Go here to find out about it if you dont have it). MSN Plus allows you to download plug-ins for MSN, and it mean you can write your own, the scripts are written in a variant of Microsoft's JScript 5.6.
From there all i had to do was find out how to connect to a serial port useing JScript, i found you could open a serial port like a file like this
com = fso.OpenTextFile("COM7:9600,N,8,1",2);
However that only seemed to work if the serial port had been opened previously so i kind of cheated and just made a Python file that opens the serial port and then disconnects.
import serial
import time

ser = serial.Serial('COM7',9600)
time.sleep(2) ## wait for the arduino to do its software reset thing
ser.close()
Now that that the msn is able to connect to the Arduino is simple to write strings to it but don't forget to close it and don't forget that when you close the serial connection the Arduino resets.
com = fso.OpenTextFile("COM7:9600,N,8,1",2);
com.Write("Something");
com.Close();
I wont post the full code here for my script to turn on msn lights unless somebody particularly wants it as i don't think it is written very well
function OnEvent_Initialize(MessengerStart)
{
fso = new ActiveXObject("Scripting.FileSystemObject");

// run the python script that wakes up the serial port
oShell = new ActiveXObject("WScript.Shell");
var command = "\"C:\\Program Files\\Python25\\python.exe\" \"C:\\Program Files\\Messenger Plus! Live\\Scripts\\wallchart\\open.py\"";
Debug.Trace(oShell.Run( command,0,true)); // wait for it to finish

// Connect to the serial port make sure you wait at least 2 seconds before writeing to it
fso = new ActiveXObject("Scripting.FileSystemObject");
com = fso.OpenTextFile("COM7:9600,N,8,1",2);
}

function OnEvent_ContactSignIn(email)
{
// Say something about who logged in to the serial
com.Write(data);
}

function OnEvent_ContactSignOut(email)
{
// Say something about who logged out to the serial
com.Write(data);
}

function OnEvent_Uninitialize(MessengerStart)
{
// Close the serial port when messenger closes
com.Close()
Debug.Trace("Closed");
}
Well that's it and i hope i managed to explain how to get MSN and arduino to talk to each other, there are many more events that would could catch data from to send to the arduino i recommend for people to read though the MSN plus developers manual here
Also this method is slightly flawed in that it is one way, i will look into a way that can read and write data to the serial port without disconnecting and reconnecting.
Good luck
EDIT: Raymond found out that this method only works with single digit COM ports e.g. COM7 as opposed to COM15
NCSS Programming Comp
I just finished the NCSS programming comp (http://challenge.ncss.edu.au/). The competition runs over 5 week with 5 problems a week and 6 problems on the final week
NCSS offers two courses Simple and advanced, last year i participated in the Simple division and managed to come first, this year i went in the advanced division and found it much more challenging but still managed to achieve a 6th. However the course did teach me about things like regular expressions.
This year NCSS was also offering an embedded course (i participated in the beta for this, where was given the arduino board in my other projects). for the embedded course you paid for a circuit board based of the arduino with many sensors and outputs already built in.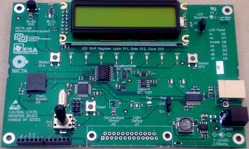
The embedded division still has one more week to go, so il update this post with my results in that then.
