Interactive Donation Box – Behind the scenes
This is a follow up article to explain the inner working of my interactive donation box if you don't have a clue what this is see my other post HERE. Besides all the visible track elements who's operation is clearly visible there are a number of hidden aspects of the machine.
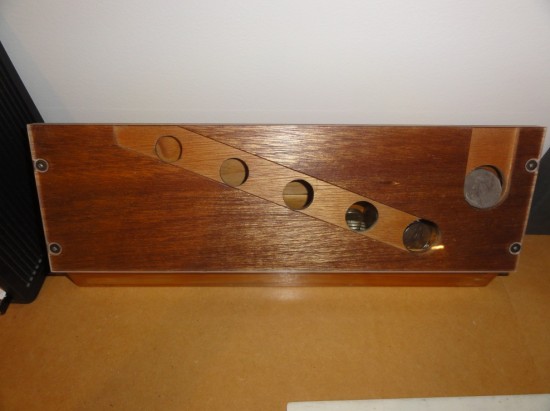
The main part of this is the mechanism for sorting and counting coins (See video below). For this i used a mechanical system of sorting the coins based upon their size. I had originally used this system in a money box that sorted coins into different trays, and knew of a few things that would greatly improve its performance. Firstly to make the back rest out of some kind of plastic material so that its finish will remain much more constant than with wood which gradually changed over time as the finish was absorbed or rubbed off, the other improvement to be made was to use rectangular holes for the coins to fall though instead of circular holes, this just allows the coins longer to fall though their holes, making it virtually impossible for them to miss their hole.
After the creation of this video i made a few change to the sorter to improved it's reliability, mainly replacing the front guide that stops coins jumping off their tracks with a stiffer version to stop 20c coins sometimes escaping off the front.
To detect the coins after they had been sorted i decided upon using a beam break system as this would mean i could reliably detect the coins even without having to worry about if the coins were heavy enough to set off a micro-switch. So i simply have a row of leds on one side of the slots the coins fall though after being sorted and a row of Light dependent resistors on the other, these are hooked up to analog in pins on the arduino controlling the system.
After a coin has been detected the program is quite simple, a certain value is added to the counter depending on what coin has been inserted, the lift i turned on whenever this value is non-zero and the counter is decremented whenever a marble passes a micro-switch hidden within one of the lift guides.
There are only a few things that i would like to do in the future, the main being to reclaim my arduino out of the back of the display, probably replacing it with a MSP430 chip as these are very cheap (under a dollar) meaning i could reclaim my arduino for future projects.
Edit: If you are interested on more details on the construction of this project i have now made my portfolio available HERE.

Leave a comment