Interactive Donation Box – Behind the scenes
This is a follow up article to explain the inner working of my interactive donation box if you don't have a clue what this is see my other post HERE. Besides all the visible track elements who's operation is clearly visible there are a number of hidden aspects of the machine.
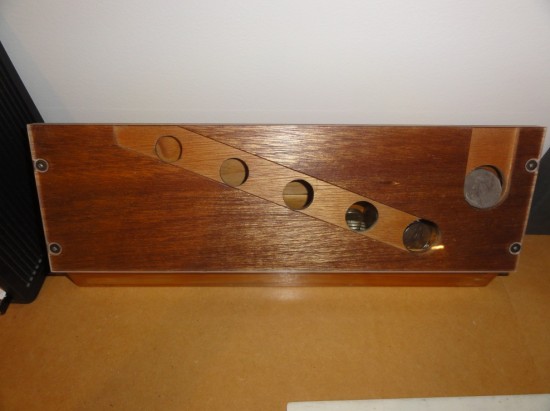
The main part of this is the mechanism for sorting and counting coins (See video below). For this i used a mechanical system of sorting the coins based upon their size. I had originally used this system in a money box that sorted coins into different trays, and knew of a few things that would greatly improve its performance. Firstly to make the back rest out of some kind of plastic material so that its finish will remain much more constant than with wood which gradually changed over time as the finish was absorbed or rubbed off, the other improvement to be made was to use rectangular holes for the coins to fall though instead of circular holes, this just allows the coins longer to fall though their holes, making it virtually impossible for them to miss their hole.
After the creation of this video i made a few change to the sorter to improved it's reliability, mainly replacing the front guide that stops coins jumping off their tracks with a stiffer version to stop 20c coins sometimes escaping off the front.
To detect the coins after they had been sorted i decided upon using a beam break system as this would mean i could reliably detect the coins even without having to worry about if the coins were heavy enough to set off a micro-switch. So i simply have a row of leds on one side of the slots the coins fall though after being sorted and a row of Light dependent resistors on the other, these are hooked up to analog in pins on the arduino controlling the system.
After a coin has been detected the program is quite simple, a certain value is added to the counter depending on what coin has been inserted, the lift i turned on whenever this value is non-zero and the counter is decremented whenever a marble passes a micro-switch hidden within one of the lift guides.
There are only a few things that i would like to do in the future, the main being to reclaim my arduino out of the back of the display, probably replacing it with a MSP430 chip as these are very cheap (under a dollar) meaning i could reclaim my arduino for future projects.
Edit: If you are interested on more details on the construction of this project i have now made my portfolio available HERE.
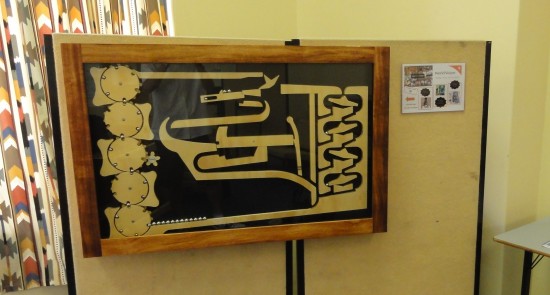
Interactive Donation Box
Well it was right down to the line but i managed to get my Design and Technology project finished and ready for marking, just... I only had confirmation that all the parts of the project played nicely together after rapidly programming it and getting to put coins into it for the first time at 3AM on the morning it was due. After a quick dash to office works at 7AM i was ready at school to hand my project in on time at 9AM.
Even though the projects design had to be greatly modified from its original 3 window design a I am really happy with how well the project has turned out and with all of the really positive responses I have got from other students and teachers. Without any more words here is the project.
Just in-case you haven't read my previous posts from way back about what the donation box actually is, here is a quick summary.
When somebody puts a coin into the machine it is sorted by currency and depending on the value of the coin a certain number of marbles are sent though a marble run (i decided on the rate of 1 marble per 10c). The idea of the project is that if it is made more interesting for people to donate then people are much more likely to make a contribution.
To better display this here is a video of the project in action
Also thanks to MWandel of woodgears.ca for his gear template generator and general articles on marble machines that made me pick this as a project
After i finish up with UNI preferences and scholarship applications i will hopefully have some more info up on what goes on behind the project
Edit: I now have another post up detailing some of the inner workings of the project HERE
Edit: If you are interested on more details on the construction of this project i have now made my portfolio available HERE.
Recycled Zero Cost 3D Scanner
This is another one of the projects I have done for Design and Technology at school. This time it is for a Year 11 minor project where we had to design the majority of the project out of reused materials that would otherwise be thrown away. I was originally going to do some more experimentation with casting aluminium but then I decided on building this 3d scanner.
The project consisted of:
- Building a turntable to be controlled by the computer that can rotate the object accurately
- Convert a laser pointer to emit a line onto the object rather than a dot
- Have some way to take pictures of the position of the laser line on the object
- Write programs to control the turntable, find and process the laser line in the captured images and display the processed information as a 3d model
Here is a picture of the general setup I ended up using (I didn't get a good photo of the new stepper and gearing I got to rotate the object)
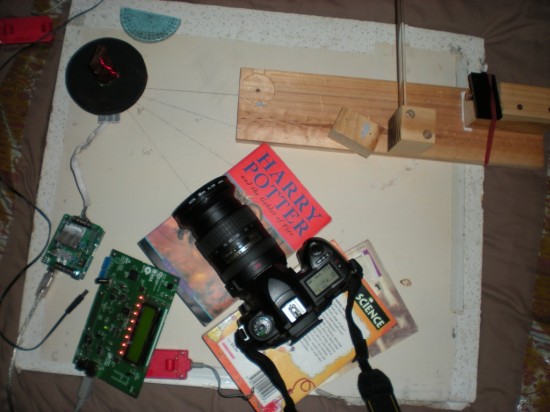
In this image you can see the turntable (black circle), the laser pointer being refracted into a line using the glass rod in the top right, the circuit board used to control the motor, and the board used as a quick way to trigger the camera.
Here are some images from the different stages of the process:
The object sits on the turntable and is rotated accurately using a stepper motor. The first stepper I used allowed 98 steps per revolution (the scan you can see below) while the second stepper motor I used had extra gearing and allowed 290 steps per revolution.
The hardest stage in the entire project is the extraction of an exact line from the image. The stages of this are:
- Load the raw image
- Extract the Red channel out of the RGB image
- Find the entire line in this image as a 2 bit image
- Decide upon an exact line through the previous blob ignoring noise
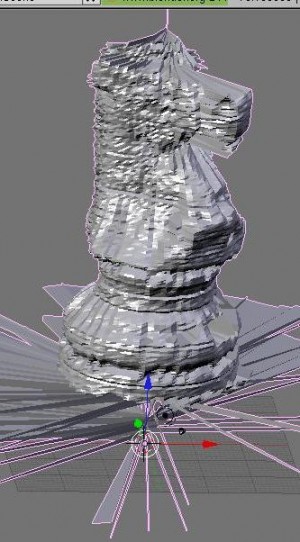
Coordinates are calculated for each point using how high in the image each point on the line is, what rotation the table was at in the image and some basic trigonometry to create thousands of data points that are then linked and covered with faces by a blender script to create a model.
Then I have simply manually tidied up the model removing where the table appears in the scan and smoothing it.
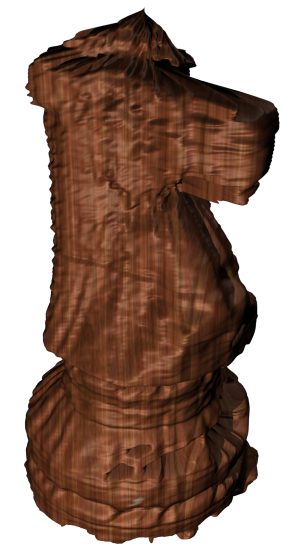
Then I have applied a stock wood texture to the model to produce the final result. I think that it has turned out rather well for a first go at creating a 3D scanner especially as it only took a few weeks and cost me nothing.
I am happy to answer any questions you might have and last of all if you are still curious here are some of the sheets I handed in with my folio to show how the points were converted after extraction.
[download id="11"]
Stacker – Arduino
For the final week of the NCSS embedded programming challenge, we had the option of creating any program we wanted (to run on the ED1 board) to be entered into a competition. For my entry i decided to make an arduino version of stacker, see the video below.
I will add the source code after the competion
The game is quite simple to play (press either button to start/stop blocks and the board's reset button to restart), but gets ridiculously hard realy quickly, i am yet to get to the leds to the end.
I also failed to compleate any of the final weeks problems, besides this one becasue of being exhasted from shifting logs.
Arduino and MSN
Since somebody asked i have written up how to get MSN and Arduino to communicate.
Firstly, i use Windows Live Messenger Plus (Go here to find out about it if you dont have it). MSN Plus allows you to download plug-ins for MSN, and it mean you can write your own, the scripts are written in a variant of Microsoft's JScript 5.6.
From there all i had to do was find out how to connect to a serial port useing JScript, i found you could open a serial port like a file like this
com = fso.OpenTextFile("COM7:9600,N,8,1",2);
However that only seemed to work if the serial port had been opened previously so i kind of cheated and just made a Python file that opens the serial port and then disconnects.
import serial
import time

ser = serial.Serial('COM7',9600)
time.sleep(2) ## wait for the arduino to do its software reset thing
ser.close()
Now that that the msn is able to connect to the Arduino is simple to write strings to it but don't forget to close it and don't forget that when you close the serial connection the Arduino resets.
com = fso.OpenTextFile("COM7:9600,N,8,1",2);
com.Write("Something");
com.Close();
I wont post the full code here for my script to turn on msn lights unless somebody particularly wants it as i don't think it is written very well
function OnEvent_Initialize(MessengerStart)
{
fso = new ActiveXObject("Scripting.FileSystemObject");

// run the python script that wakes up the serial port
oShell = new ActiveXObject("WScript.Shell");
var command = "\"C:\\Program Files\\Python25\\python.exe\" \"C:\\Program Files\\Messenger Plus! Live\\Scripts\\wallchart\\open.py\"";
Debug.Trace(oShell.Run( command,0,true)); // wait for it to finish

// Connect to the serial port make sure you wait at least 2 seconds before writeing to it
fso = new ActiveXObject("Scripting.FileSystemObject");
com = fso.OpenTextFile("COM7:9600,N,8,1",2);
}

function OnEvent_ContactSignIn(email)
{
// Say something about who logged in to the serial
com.Write(data);
}

function OnEvent_ContactSignOut(email)
{
// Say something about who logged out to the serial
com.Write(data);
}

function OnEvent_Uninitialize(MessengerStart)
{
// Close the serial port when messenger closes
com.Close()
Debug.Trace("Closed");
}
Well that's it and i hope i managed to explain how to get MSN and arduino to talk to each other, there are many more events that would could catch data from to send to the arduino i recommend for people to read though the MSN plus developers manual here
Also this method is slightly flawed in that it is one way, i will look into a way that can read and write data to the serial port without disconnecting and reconnecting.
Good luck
EDIT: Raymond found out that this method only works with single digit COM ports e.g. COM7 as opposed to COM15
